This first blog post in the series of our Data Science project of classifying SCPs is concerned with the starting point of any data-related problem, really: How do we obtain data? Fortunately, the data we want to build a Machine Learning model upon is readily available in the form of articles with standardized URLs. Thus, the task of obtaining the data comes down to writing a web crawler that parses the HTML underlying the articles and extracts the label (i.e., the Object Class) as well as the text for us.
In the following, I would like to describe my approach to this problem. Also, I will leave behind some exercises for you if you have not dealt with this kind of problem before and want to put some thought into it.
If you want to dive into the code right away and play around with the data I have created a github repository with the project code.
The post should be edible for beginning programmers that have basic knowledge of Python.
About exercises
As a mathematician, I think that you can only truly learn and understand a concept when you try it out yourself: Think of the simplest circumstance where the concept is applicable and work out the nitty-gritty details. In the process, you will have definitely learnt some of the pitfalls and specialities; others will only appear with time, when you apply the new concept to more complex environments. Likewise, I think that programming concepts can only be truly grasped when they are applied. The exercises I have created might help you with this. Some are easy refactorings solvable with standard Python constructs; others will require you to use another library and read (part of) its documentation. Both are invaluable skills as a programmer: Solving problems quickly with the programming language of your choice and trying to incorporate new libraries by reading their documentation.
How to solve the exercises
In case you want to do the exercises and quickly get to the point where you
are able to tackle one, I suggest cloning the git repository and using the
tags I have created precisely for this purpose. The exercise tags take the
form ex-<number>, e.g. ex-1 for the first exercise. Thus, you can simply
check out the commit tagged with the exercise you want to tackle and start
coding. For instance, if you want to tackle the first exercise, git checkout
ex-1 will get you there. After you're done, you can compare your solution
with mine by issuing git diff sol-ex-1.
Note that my solution is merely a suggestion. If you have found another one that you think might be more appropriate for the problem, feel free to leave a comment or open up an issue on github.
Also, I have provided difficulty tags (beginner, intermediate and expert) for the exercises. The beginner difficulty features exercises that hopefully will help you learn programming language features; this may consist of reading about a programming construct in the python docs and changing a keyword argument in a function. Intermediate difficulty signifies that you need to read about a certain feature in a library before being able to solve them. Finally, expert level exercises will require even more reading about library features as well as use some advanced concepts that cannot be fully explained in the text (this blog post contains one expert exercise that requires you to do some research about mocking in Python).
Do not hesitate to try out intermediate or expert level exercises even if you still feel like a beginner. Even if you are not able to solve them completely, there is much to learn from them.
Setting up our Data Science project
Before we start this project proper we first have to lay out our project structure. As announced in the overview blog post, we will use a Cookiecutter template for this purpose. First things first: If you have not installed cookiecutter yet, a simple
1pip install cookiecutterwill do. It is a good idea to install cookiecutter globally. After installing cookiecutter, we will use the Data Science cookiecutter template by simply issuing the command
1cookiecutter https://github.com/drivendata/cookiecutter-data-scienceYou will be asked a few questions about the project. If you're not sure how to answer, hitting enter will provide a sensible default (for instance, we don't care about setting up S3 for now).
1project_name [project_name]: SCP
2repo_name [scp]:
3author_name [Your name (or your organization/company/team)]: Paul Grillenberger
4description [A short description of the project.]: Classifying SCP articles
5Select open_source_license: 1 - MIT 2 - BSD-3-Clause 3 - No license file Choose from 1, 2, 3 (1, 2, 3) [1]:
6s3_bucket [[OPTIONAL] your-bucket-for-syncing-data (do not include 's3://')]:
7aws_profile [default]:
8Select python_interpreter: 1 - python3 2 - python Choose from 1, 2 (1, 2) [1]:After this, a folder with the project data files has been created. It is good practise to put it under version control and create an initial commit immediately, for example via
1 git init && git add -A && git commit -m "Initial Commit"To deal
with dependencies for our project, we need to create a new conda environment.
Fortunately, the provided makefile works with conda out of the box! Simply issue
make create_environment to, you guessed it, create an environment. Afterwards,
you need to use conda activate <environment> to switch to the freshly created
environment. Now, to install the requirements, a simple make requirements will
do (note that I've added some additional requirements in the repository so be
sure to add those as well if you're starting from scratch). Now we are all set
up.
Our main points of interest in this folder structure will be the folders
src/data/ (for data-related source code) and data/ (where the actual raw and
processed data will be placed). Explore the repository and read the READ.md to
get a feeling for the structure. When you're ready, we can start to work on our
project.
Rough introspection
To get an idea of what we are going to crawl on, let us take a look at the SCP Foundation Website in our browser. We are interested in the first one thousand SCPs, so we take a look at the first, say, five to get a rough idea on what each site looks like.
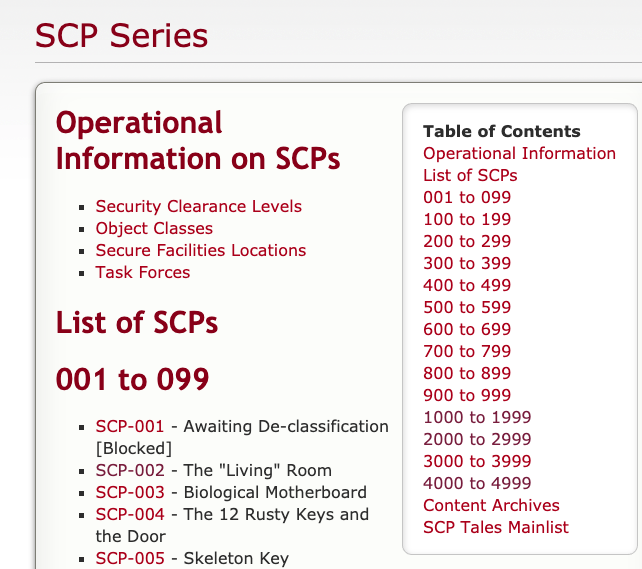
I know that number one is a special SCP that strays far from the format. The other four look similar in terms of their format, though.

It's best to skip SCP-001 because of its exceptional nature. For the others, we will take a deeper look at the HTML structure now (because that's what the web crawler libraries see).
Detailed introspection
For my browser chrome on my mac, I hit Command-Alt-I to fire up the web
developer console. Switching to the tab "Elements" yields the HTML source code
of the current page. Hovering over a line of code shows what it
corresponds to on the rendered browser page. Using this, we quickly find out
that the content is inside a div element with the id page-content.
However, most of its children are wrapped up in p elements with no
distinguishing attributes. A typical layout seems to look like this:
1<div id="page-content">
2 <div style="text-align: right;">...</div>
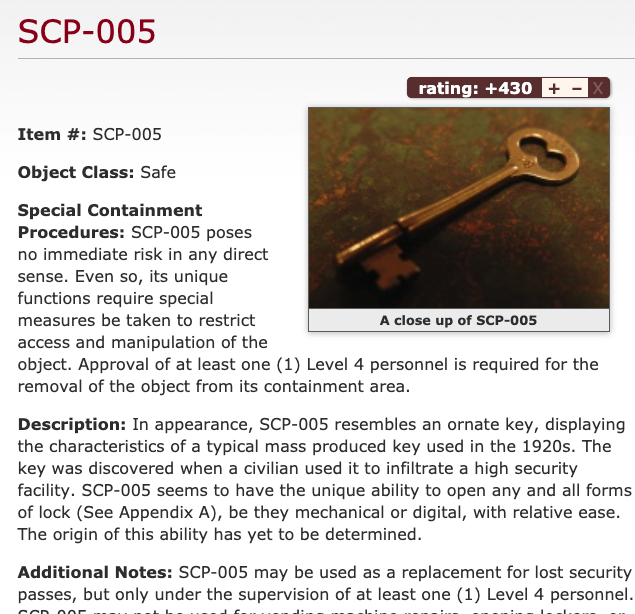
3 <div class="scp-image-block block-right" style="width:300px;">
4 <img src="http://scp-wiki.wdfiles.com/local--files/scp-005/SCP-005.jpg" style="width:300px;" alt="SCP-005.jpg" class="image"/>
5 <div class="scp-image-caption" style="width:300px;">
6 <p>A close up of SCP-005</p>
7 </div>
8 </div>
9 <p><strong>Item #:</strong> ...</p>
10 <p><strong>Object Class:</strong> ...</p>
11 <p><strong>Special Containment Procedures:</strong> ...</p>
12 <p><strong>Description:</strong> ...</p>
13 <p><strong>Addendum / Additional notes / ...:</strong> ...</p>
14 <div class="footer-wikiwalk-nav">
15 <div style="text-align: center;">
16 <p></p>
17 </div>
18 </div>
19</div>Writing the web crawler
The detailed introspection suggests the following approach: For each page,
find all direct child p elements. Then, get rid of the HTML. The line
starting with "Object Class" contains the target label. The following text
contains the data we want to predict upon.
Constructing the URL from the SCP number
Let's say that we want to crawl the article text from each SCP whose numbers are between 2 and 2500. Then the first task is to write a small function accepting a number and spitting out the URL of the corresponding SCP article. Taking a look at the URLs for SCPs #1, #11, #111, and #1111, we see that the URL format is
1http://scp-wiki.net/scp-<number>where the number is filled up with leading zeros so that it takes up at least
3 spaces. Because I like to proceed test-driven, I create two files in the
folder src/data/: A file webcrawl.py for the actual source code and a
file test_webcrawl.py for tests. In webcrawl.py, let us create a
prototype of our function:
webcrawl.pyIn test_webcrawl.py, we create a prototype test to get us started:
test_webcrawl.pyFrom the command line, issue the command pytest. As expected, pytest
complains that one of our tests fails (in this case, of course, for trivial
reasons):
pytest complainingOkay, this means that our setup works. Now let us put some real assertions depending on our yet-to-write functions in there:
This time, pytest complains because our function does not do what we expect
it to do yet:
 1    def test_construct_url():
 2>       assert "http://scp-wiki.net/scp-001" == construct_url(1)
 3E       AssertionError: assert 'http://scp-wiki.net/scp-001' == None
 4E        +  where None = construct_url(1)
 5
 6src/data/test_webcrawl.py:5: AssertionError
 7
 8 src/data/test_webcrawl.py ⨯                                                                                                                                                                                                                                                                                  100% ██████████
 9
10Results (0.09s):
11       1 failed
12 - src/data/test_webcrawl.py:4 test_construct_urlpytest to shut upIn test-driven development, this means we are in phase "RED" now: We have written a test that tells us exactly when we have established our desired functionality. Our target is to get to phase "GREEN" as quickly as possible. That means we can finally write some code. To fill up a given integer with zeros to at most three spaces, we can use elementary python String formatting:
pytest upRunning pytest afterwards tells us that our one test has passed. We are in
phase "GREEN" now. We can now safely refactor our code until we are satisfied
with it. Whenever we make changes and let the tests run, we can be confident
that our code still works as expected. Sometimes, this is called the
"REFACTOR" phase of TDD. I will leave this phase to you in the following exercises.
Exercises
Git Tag: ex-1
Get rid of the global variables BASE_URL and SCP_ROUTE_TEMPLATE and
use f-Strings to refactor construct_url. Be sure to let the tests run
afterwards to see if you still get the desired outcome.
Git Tag: ex-2
In my opinion, it is perfectly fine to violate the DRY (Don't repeat
yourself) principle when writing tests to keep them simple. However,
pytest provides some decorators that help us generate test cases when we
simply want to check on certain function outputs with varying inputs. Use
the pytest.mark.parametrize decorator to basically turn our test into a
one-liner.
Filtering for the page content
After having constructed the URL, the logical next step would be to use it
and request the data from the server. Fortunately, the requests library
solves this issue for us. A simple call to requests.get will do.
Even so, we do not need every information that a call to requests.get
returns (we do not need header data from the response, we do not need the
html header data…). Thus, our task will be to use the BeautifulSoup
library to filter everything within the div element with the id
"page-content". To test if we obtain the correct data, let us first write a
main function that will serve as the entry point to our script.
 1import argparse
 2import requests
 3
 4# construct_url as before...
 5
 6def crawl_for(scp_number):
 7    url = construct_url(scp_number)
 8    response = requests.get(url)
 9    content = response.text
10    return content
11
12if __name__ == "__main__":
13    parser = argparse.ArgumentParser()
14    parser.add_argument(
15        "--number",
16        type=int,
17        dest="scp_number",
18        default=2,
19        help="Number of the SCP article to obtain.",
20    )
21    args = parser.parse_args()
22 print(crawl_for(args.scp_number))A call to the get function of the requests library returns a
Response object whose content can be retrieved via the text attribute.
If the script is called via the command line, we use the argparse module to
parse command line arguments. In this case, we accept an optional argument
--number that defaults to 2. If you call the webcrawl.py from the
commandline now, the whole HTML from SCP #2 should be printed out. However,
as mentioned in the introduction, we are only interested in the children of
a certain div element.
To go on in a test-driven manner, we wrap a prototype function around the
response.text and write a test for it.
 1from .webcrawl import construct_url, obtain_raw_content
 2
 3
 4TEST_PAGE = """
 5    <html>
 6    <head>
 7    <title>Some scp</title>
 8    </head>
 9    <body>
10    <div id="page-content">
11        <p>Some paragraph.</p>
12    </div></body></html>
13    """
14
15# test_construct_url omitted...
16
17def test_filter_for_page_content():
18    expected = """
19<div id="page-content">
20<p>Some paragraph.</p>
21</div>
22    """.strip()
23    actual = str(filter_for_page_content(TEST_PAGE))
24 assert expected == actualOf course, this is a only basic test but sufficient for our purposes.
More concretely, we want to make sure that the function
extracts precisely the content from the HTML that we care about, namely the
div element with the id page-content and its children. Because we have not
written any code yet, pytest should signal that we are in phase RED again.
Now BeautifulSoup enters the picture. The main entry point to web crawling
is the BeautifulSoup object of the bs4 module. Its constructor takes the
raw content. The resulting instance has a find method that can be used to
find the first element with a certain name and attributes – and that's
precisely the functionality we need! The function implementation comes down
to this:
Our tests should pass again. However, pytest gives us a few warnings that
we will deal with in the exercises.
Exercises
Git Tag: ex-3
Add the features keyword argument to the constructor of the
BeautifulSoup object and assign the value "html.parser" to it to shut
down the warnings. Read the doc-string of the BeautifulSoup object to
find out why this may be useful.
Note that you might still encounter another warning concerning the import of
"ABCs" from collections instead of importing collections.abcs. At the
time of this writing, this seems to be an issue with the BeautifulSoup
library itself that we can do nothing about.
Git Tag: ex-4
Use the click library instead of argparse to parse the command line
arguments. In the repository, the file src/data/make_dataset.py
contains a good template if you get stuck. Note that you may have to move
the print statement to the crawl_for function and use the
echo() function instead.
Splitting the filtered content into the label and the text
After having completed two straightforward tasks, let us come to the heart of our problem. We have extracted the main part of an SCP article and want to split it into the object class of the underlying SCP and the article text. Before we think about a solution to this problem, let us implement a prototype function.
webcrawl.pyThen, let us write a test. Because this might not be straightforward,
let me spell out my thoughts here. The typical input of the
split_into_label_and_text function is a BeautifulSoup object containing
all children of the div element with the id page-content. In particular,
this BeautifulSoup object might contain a div element containing an image
and it contains a div element containing the footer with the links to the
previous and the next SCP article. What I want the function to do is the
following:
- It should return a tuple. The first element should be the label (i.e. the
object class), the others should be the
pelements containing the Object number, the Special Containment Procedures, the description, and, if present, any addenda. - The label should be in upper case.
The image and the footer should not be returned by the function.
Having worked out these requirements, a simple test case is not hard to pull off. We can use the typical SCP HTML structure that we have worked out in the detailed introspection as a template and boil it down a little. Here's what I came up with.
 1from bs4 import BeautifulSoup
 2# The other imports and function remain untouched...
 3
 4def test_split():
 5 test_content = BeautifulSoup(
 6     """
 7     <div class="image-content">
 8         <p>Some caption</p>
 9     </div>
10     <p><strong>Item #:</strong> SCP-xxx</p>
11     <p><strong>Object Class:</strong> Safe</p>
12     <p><strong>Special Containment Procedures:</strong> ...</p>
13     <p><strong>Description:</strong> ...</p>
14     <p>Other...</p>
15     <div class="footer">
16         <p>Links to other SCPs...</p>
17     </div>
18     """,
19     features="html.parser",
20 )
21 actual_label, actual_content = split_into_label_and_text(test_content)
22 expected_label = "SAFE"
23 expected_content = [
24     "<p><strong>Item #:</strong> SCP-xxx</p>",
25     "<p><strong>Special Containment Procedures:</strong> ...</p>",
26     "<p><strong>Description:</strong> ...</p>",
27     "<p>Other...</p>",
28 ]
29 assert expected_label == actual_label
30 assert expected_content == [str(p) for p in actual_content]
test_webcrawl.py Note that the
test_contentcontains both adivelement containing an image and anotherdivelement mocking footer data. As you can see in the listexpected_content, I do not want these to be returned by the function. As is expected, this test will fail, simply because the returnedNonevalue cannot be split into anactual_labeland anactual_content.Unfortunately,
BeautifulSoupcannot help us directly to implement this function because the object class is inside apelement without any distinguishing properties. The only safe way to obtain it is to search the text for the first occurrence of the string "Object Class". Here's my implementation.webcrawl.py A lot is happening in those five lines so let me guide you through them step by step.
- We use the find_all method to obtain a list of all
pelements. - The expression
p for p in paragraphsis a generator expression that lazily gives us the elements of theparagraphslist that satisfy the conditionif "Object Class" in p.get_text(). The built-in functionnext()evaluates the generator once and thusly gives us the firstpelement containing the string "Object Class". - We remove the
pelement containing the object class from the list. - Finally, to obtain the label transformed to uppercase, we use the
contentsattribute that is a list of the children of theBeautifulSoupobject to obtain the last element (index-1). Because the string "Object Class" itself is contained in astrongelement, this will give us the label. Thestripanduppermethods are built-in methods of the string class. - We return a tuple.
This implementation still lets the tests fail. The reason is that we return all
pelements as the second tuple element, even the mocked image caption and the footer data. The solution is to only look for the direct children that arepelements. This will be implemented in the exercises.- We use the find_all method to obtain a list of all
Exercises
Git Tag: ex-5
Use the recursive argument of the find_all method to let the tests pass.
Git Tag: ex-6
Update the crawl_for method so that it uses the freshly-implemented
split_into_label_and_text function and print out the label and the paragraphs.
Writing the results to a text file
After we have obtained the label and the text of the article we have to merely persist this data so that it can be analyzed and transformed later. The easiest way is to write each article to a text file, where the first line would be the label.
Additionally, we will add a new click.argument to our command line script that allows
us to submit a file path where the articles should be saved. If you have not
done the refactoring exercises yet the following code samples will contain spoilers.
Here's how it could go.
 1@click.command()
 2@click.argument("filepath", type=click.Path(exists=True))
 3@click.option("--number", default=2, help="Number of the SCP article to obtain.")
 4def crawl_for(number, filepath):
 5    url = construct_url(number)
 6    response = requests.get(url)
 7    content = filter_for_page_content(response.text)
 8    label, paragraphs = split_into_label_and_text(content)
 9    with open(os.path.join(filepath, f"scp-{number:03d}"), "w") as f:
10        f.write(label + "\n")
11        for paragraph in paragraphs:
12 f.write(paragraph.get_text() + "\n")webcrawl.pyNow everything falls into place. If you are in the root directory of the
project repository, a simple python src/data/webcrawl.py data/raw/ will
write the contents of the article about SCP-002 into the text file
data/raw/scp-002.txt. Because we do not want to type in this command a
thousand times, it remains to refactor the crawl_for function to accept a
range of numbers of SCP articles whose contents should be crawled.
Exercises
If you are a fan of test-driven development, you might have wondered why I
simply added the last lines of code without providing a test. Also, you
might wonder why there are no tests for the crawl_for function. The reason is
that both depend on external resources or libraries (the last lines of code
depend on a writable directory and the crawl_for function uses the requests
library to fetch data from the internet). There are solutions for these kinds of
problems but they might distract a little from the main task so that I have
decided to put them into exercises (ex-8 and ex-9).
Git Tag: ex-7
Remove the --number option and supply two options --lower and
--upper. These should be the lower and upper bounds of the numbers of
SCP articles the command line script should fetch. Remember to provide
sensible default values as well as a help text.
Git Tag: ex-8
Refactor the last three lines of the crawl_for function into another
function that accepts a file object (in the crawl_for function, this
is the f variable). Test this function by providing an appropriately
prepared StringIO object.
Git Tag: ex-9
Add a test for the crawl_for function by substituting the calls of the get
function of the requests library and the open built-in function with
appropriate Mock objects. Here are a few pointers:
- You can use the
CliRunnerfrom theclicklibrary to call thecrawl_forfunction as if you would call it from the command line. - The built-in
unittestlibrary has amockmodule with a lot of functionality aimed at creating mock objects. - The
Mockobject, themock_openfunction and thepatchdecorator are suitable tools that I used to mock theopenfunction as well as thegetcall.
A short digress on logging
If you let the web crawler run with default arguments (I chose to crawl every SCP between 2 and 1000) the script will fail miserably after a few seconds.
 1~/Data Science Projects/scp [tags/sol-ex-9] λ python src/data/webcrawl.py data/raw/
 2Traceback (most recent call last):
 3  File "src/data/webcrawl.py", line 47, in <module>
 4    crawl_for()
 5  File "/Users/paul/anaconda/lib/python3.7/site-packages/click/core.py", line 764, in __call__
 6    return self.main(*args, **kwargs)
 7  File "/Users/paul/anaconda/lib/python3.7/site-packages/click/core.py", line 717, in main
 8    rv = self.invoke(ctx)
 9  File "/Users/paul/anaconda/lib/python3.7/site-packages/click/core.py", line 956, in invoke
10    return ctx.invoke(self.callback, **ctx.params)
11  File "/Users/paul/anaconda/lib/python3.7/site-packages/click/core.py", line 555, in invoke
12    return callback(*args, **kwargs)
13  File "src/data/webcrawl.py", line 41, in crawl_for
14    label, paragraphs = split_into_label_and_text(content)
15  File "src/data/webcrawl.py", line 20, in split_into_label_and_text
16    obj_class_p = next(p for p in paragraphs if "Object Class" in p.get_text())
17StopIterationApparently, there is a problem with finding the Object Class but it is not
immediately apparent what that problem could be. Looking into the folder
data/raw, we see that only seven SCP articles have been written to text files.
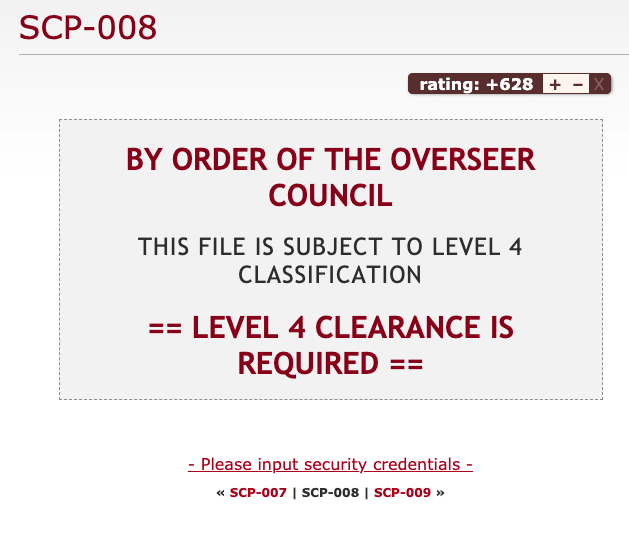
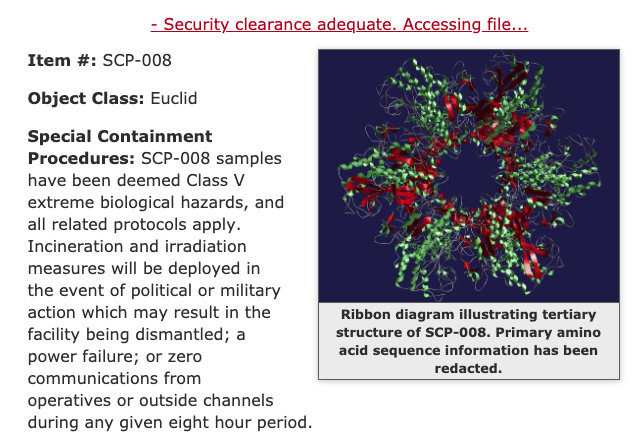
Thus, the problem occurred when crawling the eighth article. Taking a look at
the article page of SCP-008, we see that it is behind a javascript wall; the
article itself is only generated when a certain link is followed. Thus, our
program stops working because it cannot find the p element with the Object
Class in it.
This is an example of a problem that occurs in programming all the time. You have a certain expectation and build your program with that expectation in mind; however, your expectation differs ever-so-slightly from reality and all of a sudden your program stops working. Tests will help you make sure that your program works according to your expectations but they won't help you when your expectations are off. Additionally, analyzing why your program stopped working can become a huge hassle.
Fortunately, there is a general tool that will help you make your program much more communicative and your analysis much easier: Logging.
Test for the expected, log for the unexpected.
Logging not only helps you in cases where something is wrong. It may also help you make the user experience a little better. From the very moment your script starts the user does not get any feedback until an exception is thrown. However, your user might be interested in what SCP article the program is currently dealing with because they might want to know how long it takes until it is finished.
A short introduction to the python logging module
The builtin logging module helps us with both needs. A python logger has three vital parts:
- A name. This can be used to configure a logger from within a configuration file. Usually, a logger gets its module it is constructed in as its name. This implies a hierarchical structure: If you wish to activate loggers for a certain module, the loggers in submodules get activated as well – assuming they adhere to this naming convention.
- A Logging Level. This tells you what kind of messages the logger will filter out and what messages it lets through. In Python, there are the levels critical, error, warning, info, debug, and notset, sorted from very specific about the messages it lets through to letting through every message. Usually, you will use the debug level if you want to leave behind some breadcrumbs for, you guessed it, debugging to yourself in the future or some colleague, the info level for general information about where your program is and what its state is, the warning level for logging program states that are unusual and might hint at a problem arising in the near future and the error and critical level for exceptions and critical conditions that will hinder your program from working successfully.
- One or more handlers. A handler defines how to deal with logging messages – should they be printed out to the console, or should they be written to a log file? A handler has its own logging level and thus is able to filter out specific logging messages. Also, it defines a logging format (through a formatter) that can give additional information.
We will define a logger with the module name (the magic name attribute) and
three handlers: One handler (console_handler) that logs info messages to the
console (thus, the user will at least experience where the program is at), and
two FileHandlers that log debug messages and warnings to two separate files. The
warning log will help us quickly identify that something went wrong while the
debug log will give us detailed information why.
 1import logging
 2
 3
 4logger = logging.getLogger(__name__)
 5logger.setLevel(logging.DEBUG)
 6std_formatter = logging.Formatter(
 7    "[%(asctime)s][%(levelname)-5s][%(threadName)s] - %(message)s"
 8)
 9warn_file_handler = logging.FileHandler("warnings.log")
10warn_file_handler.setFormatter(std_formatter)
11warn_file_handler.setLevel(logging.WARN)
12debug_file_handler = logging.FileHandler("debug.log")
13debug_file_handler.setFormatter(std_formatter)
14debug_file_handler.setLevel(logging.DEBUG)
15console_handler = logging.StreamHandler()
16console_handler.setFormatter(std_formatter)
17console_handler.setLevel(logging.INFO)
18logger.addHandler(console_handler)
19logger.addHandler(warn_file_handler)
20logger.addHandler(debug_file_handler)The logger definition itself is pretty useless until we emit logging messages. I have decided to put a few info messages at the beginning and the end of our script as well as some debug messages that log the content of intermediate results. Furthermore, I added a warning message if the label we have identified is not one of SAFE, EUCLID or KETER.
 1# click decorators omitted...
 2def crawl_for(lower, upper, filepath):
 3    logger.debug(
 4        "Called with lower = %s, upper = %s, filepath = %s", lower, upper, filepath
 5    )
 6    for number in range(lower, upper):
 7        logger.info("Crawling number %d", number)
 8        url = construct_url(number)
 9        logger.debug("URL: %s", url)
10        response = requests.get(url)
11        logger.debug("Response: %s", response.text)
12        content = filter_for_page_content(response.text)
13        logger.debug("Content: %s", content)
14        label, paragraphs = split_into_label_and_text(content)
15        logger.info("Identified label %s", label)
16        logger.debug("Paragraphs: %s", paragraphs)
17        if label not in ("SAFE", "EUCLID", "KETER"):
18            logger.warn("Unknown label %s for number %d", label, number)
19        with open(os.path.join(filepath, f"scp-{number:03d}.txt"), "w") as f:
20            write_to(f, label, paragraphs)
21
22
23if __name__ == "__main__":
24    logger.info("Start webcrawling...")
25    crawl_for()
26 logger.info("End webcrawling...")Letting the script run now, we get a nice status message for each number and immediately see that something fails when crawling the article for SCP-008:
1[2019-11-13 15:03:19,796][INFO ][MainThread] - Crawling number 7
2[2019-11-13 15:03:20,398][INFO ][MainThread] - Identified label EUCLID
3[2019-11-13 15:03:20,398][INFO ][MainThread] - Crawling number 8
4Traceback (most recent call last):
5  File "src/data/webcrawl.py", line 78, in <module>
6    crawl_for()
7(Rest of traceback omitted)For the moment, I will simply catch the exception, emit an error logging message and continue the for loop.
As a closing remark for this section, I would like to mention that logging ultimately comes down to personal preference, be it your own or that of your team. Arguably, a plethora of logging calls may pollute your code and obfuscate the meaning. It can be hard to find the right balance – that only comes with experience.
Exercises
Git Tag: ex-10
Add a debug message to the split_into_label_and_text function that logs the
content of the paragraphs variable.
Git Tag: ex-11
While the logging configuration is necessary, it also pollutes the program: A
reader of the source code has to wade through 15 lines of code detailing the
logging configuration when they might simply want to find out how the internal
logic of the program works. Therefore, use the fileConfig to put the logging
configuration into a file. Here are a few hints that help you avoid some
pitfalls I stumbled upon when building my configuration file:
- First, the section on the file format in the docs contains a few examples that should help you on your journey.
- Second, the script will be called from the root directory of the project. As a result, it is feasible to also put the logging config into the root directory.
Third, since we will be calling the script directly via the command line, the
__name__attribute will equal"__main__". I suggest configuring the root logger with the three handlers and a debug log level and one additional logger as follows.Definition of a __main__loggerThe flag
propagatewill emit every log message to parent loggers. Because the root logger, as its name suggests, is a parent of every logger the handlers of the root logger will deal with the log messages emitted by the main logger – even though the main logger does not define any handler itself.- Finally, it is possible that we will modify the logging config in the future. Also,
your logging preferences might differ from mine. Consequently, I only committed a
file
logging_config_template.iniand added it to version control and put thelogging_config.iniinto.gitignore.
Note that it is also possible to configure logging with a yaml file, parse it
with the library pyyaml
and feed the resulting dictionary into dictConfig.
The plain fileConfig is older and does not support every feature that
dictConfig does so that this seems to be the new best practice for configuring logging
via a file.
Speeding it up with threading
We could let the script run now and it would fetch the first one thousand SCP
articles for us; however, it will take some time. On my machine, each crawl for
a single SCP article takes about 600 ms. That is to say, a thousand crawls will take
about 600 seconds which is 10 minutes.
Analysing the timestamps in the debug.log, it seems that most time is spent
waiting for the GET request to deliver the data.
Multi-threading and multi-processing in Python
Coming from JAVA, a language that naturally supports concurrency, I was surprised to learn that Python distinguishes between multi-threading and multi-processing. This is due to the global interpreter lock that assures "that only one thread executes Python bytecode at a time." To clarify, multi-threading in Python refers to concurrent programming in a single processor while multi-processing distributes over different processor kernels. As a rule of thumb, multi-threading is useful when you want to make IO-heavy tasks (such as waiting for request responses and reading from or writing to files) concurrent. For computation-heavy tasks (such as solving equations, training Machine Learning models…), stick to multi-processing.
Implementing multi-threading via ThreadPoolExecutor
Using the tools in the concurrent.futures module, turning a for loop
concurrent can be done using an easy-to-follow pattern. I would like to call it
the Concurrency Refactoring Pattern or CRP for short.
- Refactor everything in the for loop into a function accepting the variable that is iterated over as its argument.
- Replace the for loop with a
withstatement initialising aThreadPoolExecutor. - Replace the call of the new function with a call to the
mapmethod of the initialised executor with the new function and the iterable that was iterated over in the for loop as its arguments.
To make this pattern clearer, here are code samples illustrating the CRP.
Even though the amount of code does not differ that much, a lot is happening in
these two lines. First, the ThreadPoolExecutor is initialised with a maximum
of 64 workers (threads). Think of this ThreadPoolExecutor as a manager that
gives the workers something to do. In addition, it manages the case where there is not
enough work to do for the amount of workers that we requested (imagine the case
when we only want to obtain 60 SCP articles but we initialised the
ThreadPoolExecutor with 64 max_workers – in this case, only 60 threads
would be started). Second and last, the map method initiates the distribution of work
among the workers. It accepts a function and an iterable as its arguments; here,
the iterables will be called to obtain function arguments that the workers
should feed into the function.
In our case, the situation is slightly more complicated as our function will
depend on two arguments: the filepath and the number. Even though the
filepath does not change in the for loop we still have to create an iterable
with the same length as the range we are iterating over. Here's how it will turn
out.
 1# other imports unchanged...
 2from concurrent.futures import ThreadPoolExecutor
 3
 4# other functions unchanged ...
 5def crawl(filepath, number):
 6    logger.info("Crawling number %d", number)
 7    url = construct_url(number)
 8    logger.debug("URL: %s", url)
 9    response = requests.get(url)
10    logger.debug("Response: %s", response.text)
11    content = filter_for_page_content(response.text)
12    logger.debug("Content: %s", content)
13    try:
14        label, paragraphs = split_into_label_and_text(content)
15    except Exception:
16        logger.exception("Exception when splitting for number %d", number)
17        return
18    logger.info("Identified label %s", label)
19    logger.debug("Paragraphs: %s", paragraphs)
20    if label not in ("SAFE", "EUCLID", "KETER"):
21        logger.warn("Unknown label %s for number %d", label, number)
22    with open(os.path.join(filepath, f"scp-{number:03d}.txt"), "w") as f:
23        write_to(f, label, paragraphs)
24
25
26# click decorators ommitted...
27def crawl_for(lower, upper, filepath):
28    logger.debug(
29        "Called with lower = %s, upper = %s, filepath = %s", lower, upper, filepath
30    )
31    with ThreadPoolExecutor(max_workers=64) as executor:
32        executor.map(
33            crawl, (filepath for _ in range(lower, upper)), range(lower, upper)
34 )As you can see, you should supply the map method as many iterables as
your function has arguments.
Exercises
Git Tag: ex-12
Turn the max_workers number 64 into a click option.
Clean up
After having run the web crawler, watching the 64 threads delightfully
crunching through the pages and punching them into text files, it is time to
take a look at the results. There are quite a few warnings and errors logged
into our warnings.log. Let's take a look at them and see if we have to
modify the web crawler and re-run it once more.
Errors: SCP pages we were not able to crawl correctly
Using the warnings.log, we can estimate how many errors occurred.
1grep "\[ERROR\]" warnings.log | wc -lHere, it pays off that we incorporated the log level into our log format.
Note that we have to escape the square brackets with backslashes because
they have a special meaning in regular expressions. In my run, I got 12 error log
messages. Taking a closer look at them, we see that there are quite a few
SCPs that have a javascript wall in front them. For instance, we already know about
SCP-8. Others have a slightly different HTML structure: SCP-285 has another div element
wrapped around the p elements with the content we are interested in. I
plan on ignoring all of them for the moment.
Warnings: Unknown labels
Using the warnings.log, we can estimate how many of the crawled SCPs have
been assigned an unexpected label. A quick grep combined with the word count
utility comes to the rescue:
1grep "Unknown label" warning.log | wc -lFor my run with default bounds this yields 56 unknown labels. Closer inspection shows that the majority is not an unknown label but a known label with further information. For instance, SCP-417 is classified as Euclid but the author wanted to note that it could be potentially Keter. Furthermore, there are a few SCPs that apparently have been assigned a finer classification. For example, SCP-66 is classified as "euclid-impetus" and SCP-625 as "euclid-flecto". Because the majority of the SCPs is not classified this way, I plan on only using the coarse label. The truly unexpected labels are the following:
- None (48)
- Thaumiel (179, 378)
- Neutralized (356, 407, 541, 696, 821, 818)
- Scarf (586)
For the neutralized ones, a few of them have a previous assigned label such
as SCP-818. I could take the former label into account but since we are only
talking about a hand full of data points here, I plan on ignoring them
altogether. The "Scarf" one is interesting. Apparently, the underlying
SCP causes writers to make typos when writing about it. I suppose that the
real label should be "Safe". The SCP belonging to the "None" label seems to
be a placeholder.
There are also a
few (expected) labels with a leading colon, for instance for SCP-75.
Apparently, this is caused by the colon not being inside the strong
element. This can be fixed with not too much hassle so let's do it right
now.
Fixing the "leading colon label" bug
First, let's write a test reproducing the bug by copying our
test_split method and moving the colon behind the "Object class" out of
the strong element:
 1    def test_split_with_leading_colon(self):
 2        test_content = BeautifulSoup(
 3            """
 4            <div class="image-content">
 5                <p>Some caption</p>
 6            </div>
 7            <p><strong>Item #:</strong> SCP-xxx</p>
 8            <p><strong>Object Class</strong>: Keter</p>
 9            <p><strong>Special Containment Procedures:</strong> ...</p>
10            <p><strong>Description:</strong> ...</p>
11            <p>Other...</p>
12            <div class="footer">
13                <p>Links to other SCPs...</p>
14            </div>
15            """,
16            features="html.parser",
17        )
18        actual_label, actual_content = split_into_text_and_label(test_content)
19        expected_label = "KETER"
20        expected_content = [
21            "<p><strong>Item #:</strong> SCP-xxx</p>",
22            "<p><strong>Special Containment Procedures:</strong> ...</p>",
23            "<p><strong>Description:</strong> ...</p>",
24            "<p>Other...</p>",
25        ]
26        self.assertEqual(expected_label, actual_label)
27 self.assertEqual(expected_content, [str(p) for p in actual_content])To make the tests a little more diverse, I also changed the label from "Safe" to "Keter". Running the tests should get you precisely one fail:
The easy way to fix it would be to simply do a string replace on the label
inside the split_into_text_and_label function:
1label = obj_class_p.contents[-1].strip().upper().replace(": ", "")Our tests should be green again. This reduced the unexpected label warnings to 41. We could also make the web crawler deal with labels such as "euclid-impetus" and only write the coarser label to the text file. However, I plan on leaving that to the data transformation blog post.
Preparing for the next step: Editing make targets
The Data Science cookiecutter template defines several make targets that will be
useful in the next blog post. Using the make command line utility allows us to
execute quite complex command line scripts such as our web crawler with a simple
API. Also, it lets us define dependencies such as "only run this task if this
source code file changed."
The make utility is configured via a Makefile. One is already present in the
project and for instance defines a clean target that deletes all compiled
Python code (that is, it deletes all __pycache__ directories and files ending
in .pyc or .pyo). This clean target is executed via make clean. In the Makefile,
let's also add that log files should be cleaned up.
makeNow, whenever you execute make clean, all log files will be deleted.
Furthermore, we will add a new target (under "PROJECT RULES") that will execute
the web crawler.
Note that this target has a dependency. Namely, it depends on the file
src/data/webcrawl.py. What make does is the following: It checks whether the
date when the file webcrawl.py has been changed is younger than the date when
the directory data/raw has been changed. If so, it executes the following
tasks. Otherwise, it will tell you that the target is up-to-date.
Finally, we add the target data/raw as a dependency to the data target.
The data target is a template from the Data Science project. It will be
implemented next time when we are dealing with data preprocessing and
transformations.
Exercises
Git Tag: ex-13
The data/raw directory need not exist after having cloned the repository. Edit
the data/raw target in the Makefile so that it will be created.
Git Tag: ex-14
Add a new target logging_config.ini. Executing this target should copy the
file logging_config_template.ini to logging_config.ini. Furthermore, add a
new phony target, i.e. a target that does not correspond to a file name, called
setup that does not execute any additional actions but depends on the targets
logging_config.ini and create_environment.
Conclusion
We have come quite a long way in this blog post. In more detail, you have learnt how to:
- Write code in a test-driven manner using
pytest, - Set up logging using the builtin
loggingmodule, - Implement multi-threading using the builtin
concurrent.futuresmodule, - Use the
requestslibrary to issue aGETrequest, - Make use of the
BeautifulSouplibrary to parse HTML, and - Read a
Makefileand usemaketargets.
Hopefully, I could demonstrate how to use cookiecutter templates in general and, more specifically, how to use the Data Science template.
Further reading
I have linked to the documentations of the libraries we have used throughout. However, if you want to take an even deeper dive into some of those topics, I suggest the following.
- Automate the Boring Stuff with Python by Al Sweigart is a beginner-friendly
introduction to automation scripts with Python. It gives you step-by-step
instructions for your scripts as well as further projects to work on. In
particular, I would recommend the eleventh chapter Web Scraping for
strengthening your understanding of web crawling and working with
requests,BeautifulSoupand related libraries I have not mentioned in this blog post. - Effective Python by Brett Slatkin gives you an overview over best practices of different topics. In particular, I would recommend the fifth chapter Concurrency and Parallelism if you would like to strengthen your understanding on multi-threading and -processing.
- The examples on how to work with
makeon the Cookiecutter Data Science page are helpful learning resources.